In Android Studio, GridView is a type of View Group that is use to display items in scrolling manner, also it can be say as two dimensional way like rows and columns.
In this post, we will learn step by step how to implement Custom GridView in Android Studio with a number of images and title texts.
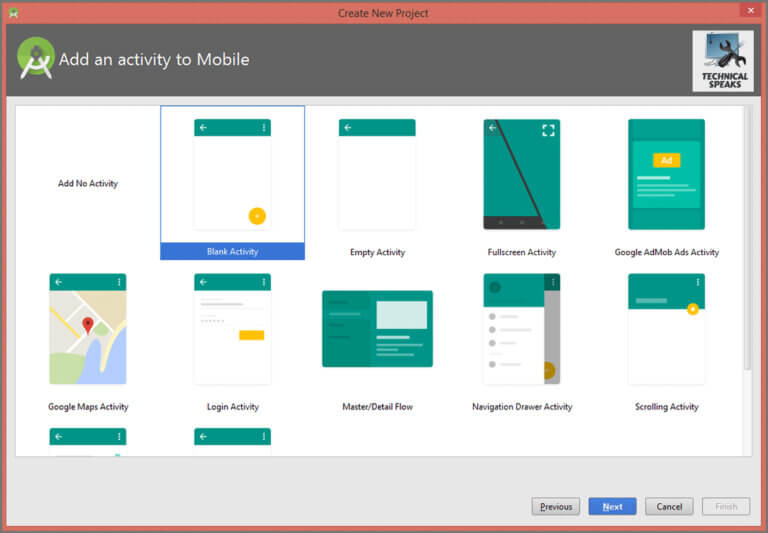
1. Create Project:
>> Open Android Studio and create a new project like I did in this pic.

2. Go to the Main Layout:
The main layout is “activity_main”. The code for activity_main.xml:
<?xml version="1.0" encoding="utf-8"?>
<RelativeLayout xmlns:android="http://schemas.android.com/apk/res/android"
xmlns:app="http://schemas.android.com/apk/res-auto"
xmlns:tools="http://schemas.android.com/tools"
android:layout_width="match_parent"
android:layout_height="match_parent"
tools:context=".MainActivity">

<GridView
android:id="@+id/grid"
android:layout_width="match_parent"
android:layout_height="match_parent"
android:layout_margin="2dp"
android:layout_alignParentTop="true"
android:layout_alignParentStart="true"
android:layout_alignParentLeft="true"
android:numColumns="3"/>

</RelativeLayout>
3. Another layout File:
This layout file basically has two items a TextView and an ImageView, the TextView is to display the text and the ImageView is to display the image. The code for demogrid.xml file:
<?xml version=”1.0″ encoding=”utf-8″?>
<RelativeLayout xmlns:android=”http://schemas.android.com/apk/res/android”
android:layout_width=”match_parent”
android:layout_height=”match_parent”
xmlns:tools=”http://schemas.android.com/tools”>

<ImageView
android:id=”@+id/imageView”
android:layout_width=”128dp”
android:layout_height=”128dp”
android:layout_alignParentLeft=”true”
android:layout_alignParentTop=”true”
android:layout_alignParentStart=”true”
android:layout_marginTop=”0dp”
android:layout_marginLeft=”0dp”
android:layout_marginStart=”0dp”
tools:srcCompat=”@tools:sample/avatars”/>

<TextView
android:id=”@+id/textView”
android:layout_width=”wrap_content”
android:layout_height=”wrap_content”
android:layout_alignParentStart=”true”
android:layout_alignParentTop=”true”
android:layout_alignParentLeft=”true”
android:layout_marginTop=”150dp”
android:layout_marginLeft=”50dp”
android:layout_marginStart=”50dp”
android:text=”Title”/>

</RelativeLayout>
4. The Adapter:
An adapter here works as a bridge between layout file and the main java file. It basically provides access to the data items. The code for adapter.java:
package sou.com.customgrid;

import android.content.Context;
import android.view.LayoutInflater;
import android.view.View;
import android.view.ViewGroup;
import android.widget.BaseAdapter;
import android.widget.ImageView;
import android.widget.TextView;

public class adapter extends BaseAdapter {

Context c;
int image [] = {R.drawable.cricket, R.drawable.basketball, R.drawable.football, R.drawable.hockey, R.drawable.baseball, R.drawable.tennis};
String data []= {“Cricket”, “Basketball”, “Football”, “Hockey”, “Baseball”, “Tennis”}; // Array of text which we want to show down to the image

adapter(Context c){
this.c = c;
}

@Override
public int getCount() {
return image.length;   // This basically show all the data inside the grid view item
}

@Override
public Object getItem(int position) {
return null;
}

@Override
public long getItemId(int position) {
return 0;
}

@Override
public View getView(int position, View convertView, ViewGroup parent) {
LayoutInflater layoutInflater = (LayoutInflater) c.getSystemService(Context.LAYOUT_INFLATER_SERVICE);
convertView = layoutInflater.inflate(R.layout.demogrid,null);
ImageView iv = convertView.findViewById(R.id.imageView);
TextView tv = convertView.findViewById(R.id.textView);
tv.setText(data[position]);
iv.setImageResource(image[position]);
return convertView;
}
}
5. MainActivity.Java:
What we do in the main java file is get id of the GridView and further set the adapter to the GridView. The code for MainActivity.java:
package sou.com.customgrid;

import androidx.appcompat.app.AppCompatActivity;

import android.os.Bundle;
import android.widget.GridView;

public class MainActivity extends AppCompatActivity {

@Override
protected void onCreate(Bundle savedInstanceState) {
super.onCreate(savedInstanceState);
setContentView(R.layout.activity_main);
GridView gridView = (GridView) findViewById(R.id.grid);

adapter ad = new adapter(this);
gridView.setAdapter(ad);

}
}